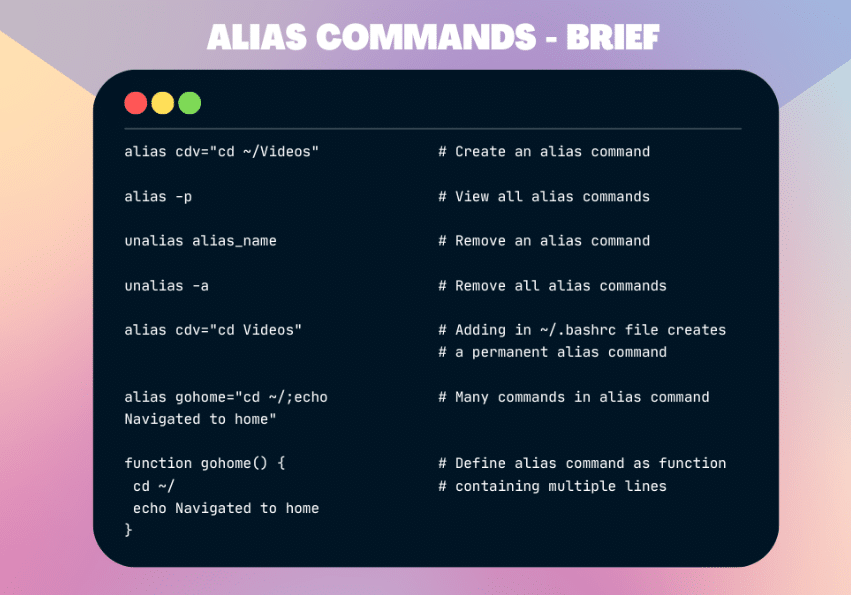
In this article, we will discuss the process of creating customized Linux commands. This is an essential skill for Linux users, as it can greatly enhance their productivity and efficiency when working in the command line interface. By following the steps outlined in this guide, you will learn how to create personalized commands that suit your specific needs and preferences. So if you’re ready to take your Linux skills to the next level, read on and discover the power of creating your own Linux commands.
What are Alias commands in Linux?
The alias command is a powerful tool in the Linux command line that can help you save time and effort. With it, you can create customized shortcuts for frequently used commands, making them much easier to remember and use. Essentially, the alias command provides a string value that replaces a command name when it is entered. The best part? These shortcuts have the same functionality as the full commands they represent, making your workflow more efficient and enjoyable.
So, if you’re tired of typing out long and complex commands every time you need to perform a task, why not give the alias command a try? You may just find that it adds a whole new level of convenience and fun to your Linux experience!
How to Create Your Own Linux Commands
By utilizing the alias command, you can create your own custom commands in a straightforward and efficient manner.
This is a valuable skill that can significantly streamline your Linux workflow and enhance your productivity. The syntax for the alias command is as follows:
alias [alias-name[=string]...]To illustrate the process of creating your own custom command, consider the following example.
Suppose you wish to create a command named “cdv” that instantly takes you to the Videos directory when entered in the terminal.
Typically, navigating to a directory requires using the “cd” command followed by the directory name. However, in this case, we can simplify the process by creating an alias command that directly takes you to the desired directory. As demonstrated in the accompanying screenshot:

Videos directoryLet’s create our command called cdv to navigate to the Videos directory.
To achieve that, you have to enter the following command in your terminal:
alias cdv="cd Videos"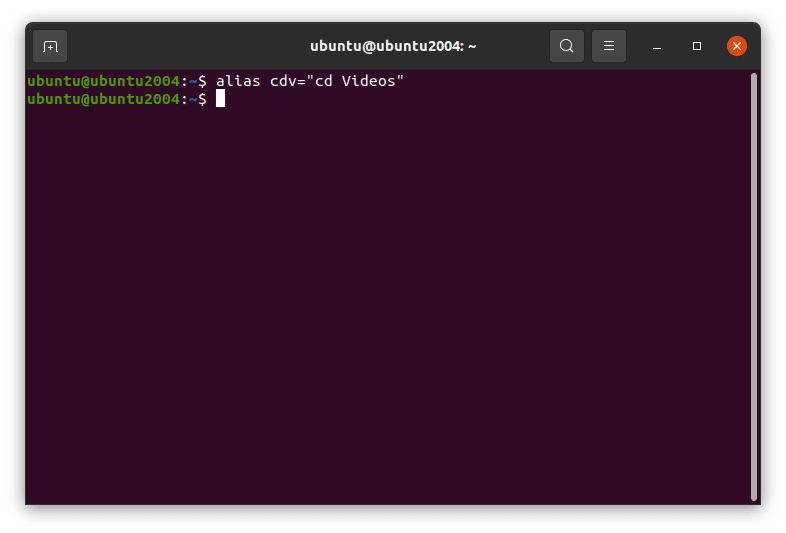
alias) command to create our own commandWe have created our command. From the above screenshot, you can see that it does not return anything.
But, how can we verify that the command is created and it is working?
There’s only one way to verify if the command is working: that’s by executing the created command.
Run the cdv command on your terminal to see what happens:
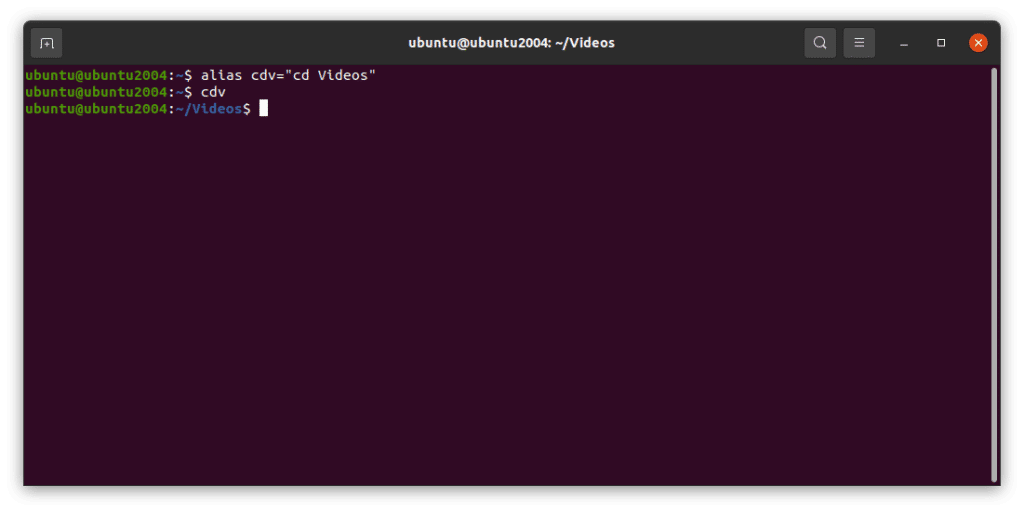
cdv commandAnd with that, you have successfully created your own custom command. Congratulations! This newfound skill can greatly improve your efficiency and productivity in the Linux command line interface. So take pride in your accomplishment and keep exploring the possibilities of customizing your commands.
How to Show your created Alias Commands
You may have the following question after creating a few commands:
Let’s assume I created multiple alias commands. How can I view all of them together? How can I view the equivalent command of my alias?
You can view all your alias commands by appending the -p flag to the alias command like this:
alias -p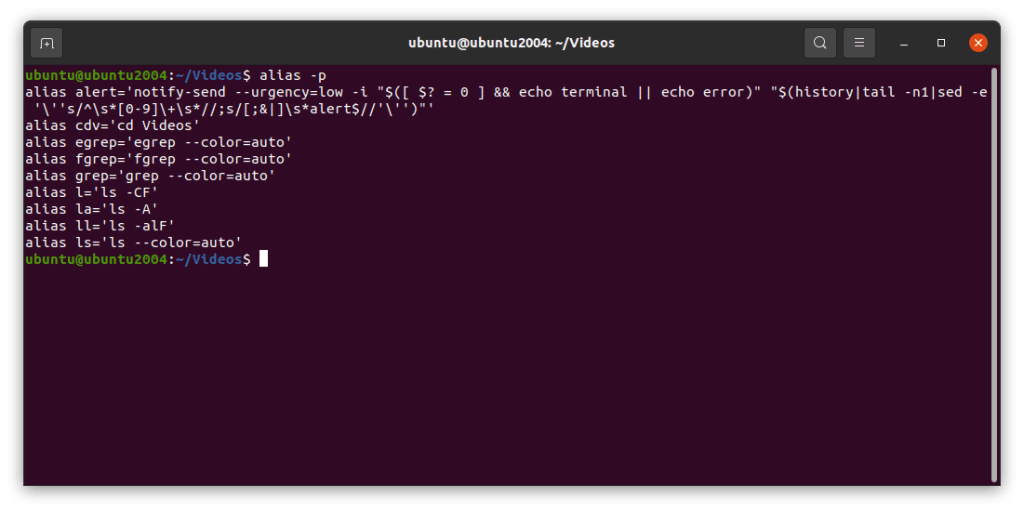
How to Remove an Alias Command in Linux
Pass your alias name to the unalias command as an argument to remove the alias command.
unalias alias_name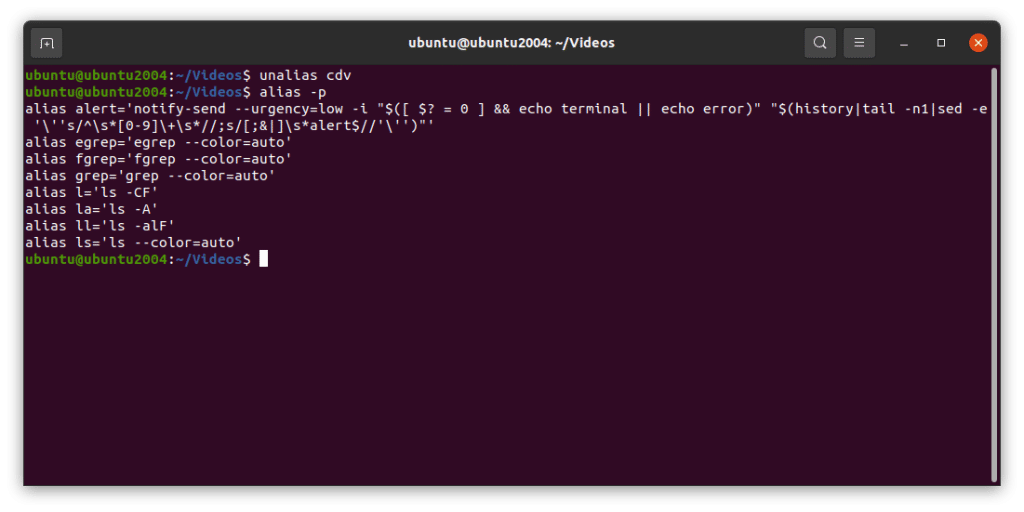
unalias) to remove an alias commandHow to Remove All Alias Commands in Linux
Let’s assume you have added around 20 alias commands. After some time, you realized that using alias commands will make you forget other commands in the long term. Fearing that, you wish to remove all the alias commands.
We have a command to achieve that:
unalias -aYou may be curious to know more about one thing that I’ve written in the above passage.
“After some time, you realized that using alias commands will make you forget other commands in the long term”
Is this something you should worry about? Can this happen?
The answer to your first question is, yes. Definitely, you’ll get this feeling when you’re learning and trying out alias commands. Because I had the same feeling.
The answer to your second question is, absolutely no. This will result in increased productivity. There’s a high chance that you’ll forget the command you created but you’ll never forget the original command. So I always recommend revisiting your alias commands often and ensure you’re using all the alias commands you created.
I have a shocking surprise for you. Open a terminal window and create an alias command (we’ll use the cdv command we created above). Open another terminal window and type the cdv command there.
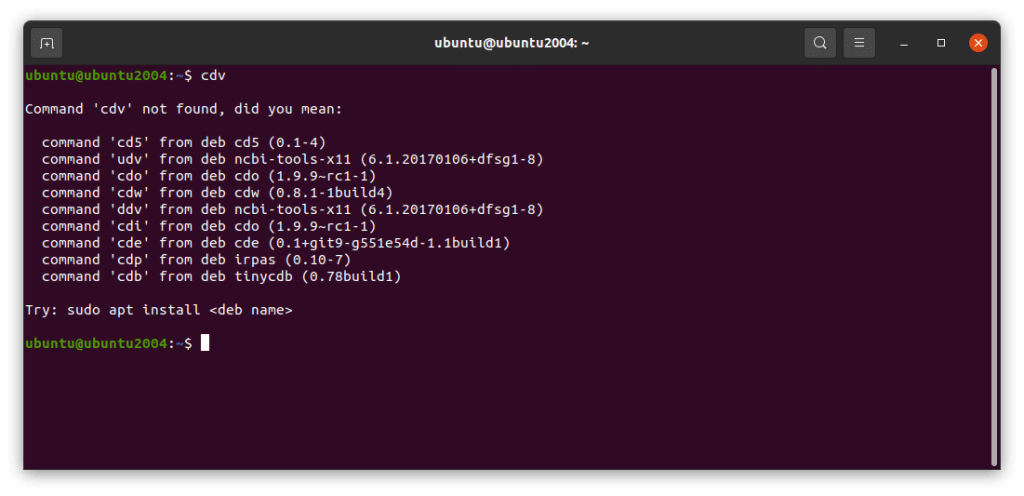
Surprised?
Yes. If you create an alias command, it’ll be active only for the particular instance of the terminal. It’ll not be created permanently, so you won’t be able to access it in two different terminal windows unless you run the alias command on both terminals.
How to Create a Permanent Alias Command
To create a permanent alias command, you have to add the alias command to the shell configuration file. There are many shell configurations available. A few of the well-known shells are:
- Bash – ~/.bashrc
- Zsh – ~/.zshrc
- Fish – ~/.config/fish/config.fish
Most Linux distros work with bash, so let’s look at creating a permanent alias in the bash shell. Other shells work pretty much the same.
Let’s open the .bashrc file using nano.
sudo nano ~/.bashrcNavigate to the bottom of the file. Add the alias command you want to add permanently.
alias cdv="cd Videos"Save and exit nano by pressing the Ctrl and x key.
Every time you make a change to the shell configuration file, you have to reload the file again for your changes to take effect immediately.
All the terminal windows you open from now will contain your alias command by default.
You may open multiple windows and check by entering the alias -p command.
Some Helpful Alias Commands to Try
Here’s a bonus for you all.
You can either follow the instructions in the README file of this repo or follow the instructions below to set up the alias commands on your machine.
Navigate to the Home folder
Navigate to home directory
cd ~/Clone the repo
Clone the alias commands repo from GitHub:
git clone https://github.com/gogosoon/x-commands.gitAdd a reference to the alias command file
Open the ~/.bashrc file using nano:
sudo nano ~/.bashrcAdd the following line at the end of the file:
source ~/x-commands/aliasCommands.shSave and exit nano by pressing Ctrl and x.
Reload the terminal
Reload the terminal by running the following command:
source ~/.bashrcThat’s it. You’re all set. To verify that the setup is done and it’s up and running, run the following command in the terminal:
welcomeYou’ll be asked to enter your name. Type your name and press Enter.
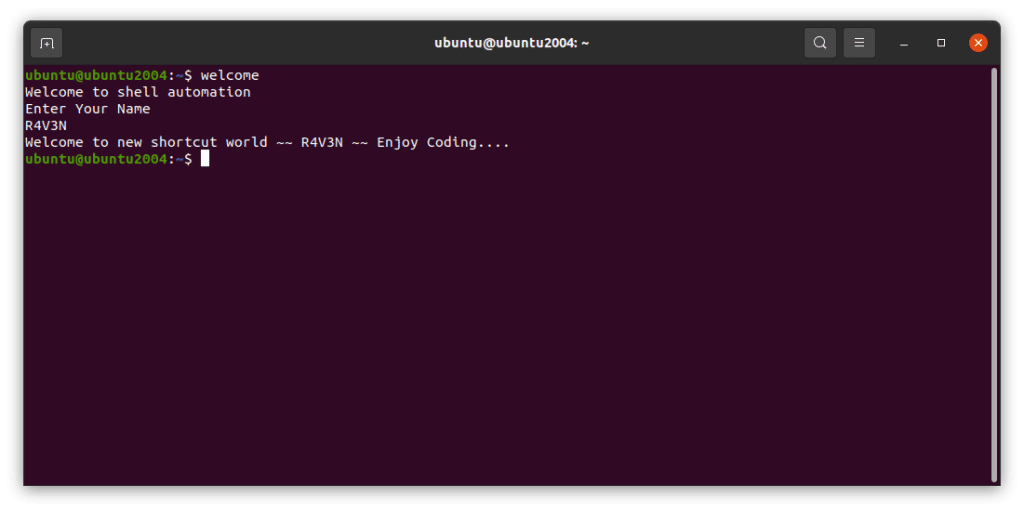
You’ve installed it the right way if you get the above message.
Let me explain the alias commands you’ll have access to using this repo.
Alias Command | Original Command | Description |
| f | cd $1 | Go forward. Navigate to the next specified directory |
| b | cd .. | Go backward. Navigate back 1 directory |
| c | code ./ | Open Visual Studio Code in the current directory |
| e | exit | Close the terminal tab/window |
| home | cd ~ | Navigate to the home directory |
| a | xdotool key ctrl+shift+t | Open a new terminal tab |
| cdb | cd - | Go to the last directory where you were previously |
| gst | git status | Find the status of the git repo |
| glo | git log --oneline | Show git commit logs in a single simplified line |
| gcl | git config -l | Show the git configuration of the current repo |
| gca | git commit --amend | Add the current changes to the existing commit |
| gcane | git commit --amend --no-edit | Add the current changes to the existing commit without editing the existing commit message |
| ad | ~/Android/Sdk/emulator/emulator -list-avds | Show available android emulators |
| off | sudo /opt/lampp/lampp stop poweroff systemctl poweroff -i | Turn off your machine |
| bb | if [ -z “$1” ] then b;b else for (( i=0;i<$1;i++ )) do b done fi | It’s an advanced version of go back command. Entering the b command goes back to only one directory. But entering bb goes back to 2 directories. If you want to go 5 directories back, run bb 5 command |
| pokill | kill $(lsof -t -i:$1) | Kill the program running on the port |
| cc | sudo nano ~/x-commands/aliasCommands.sh | Edit the alias commands file |
| bc | sudo nano ~/.bashrc | Edit the .bashrc file |
| scc | source ~/x-commands/aliasCommands.sh | Refresh the terminal after updating an alias command |
| bcc | source ~/.bashrc | Refresh the terminal after updating .bashrc file |
| welcome | echo Welcome to shell automation echo Enter Your Name read testName echo Welcome to new shortcut world ~~ $testName ~~ Enjoy Coding…. | Verify if alias commands installation is done right |
If you look at the aliasCommands.sh file carefully, you’ll see that I’ve added a few functions. You may wonder why I use functions. Read more to have a quick dive into this topic.
How to Run Multiple Commands in a Single Alias Command
You can achieve this in 2 ways. Let me explain both of them here.
Let’s learn this with an example.
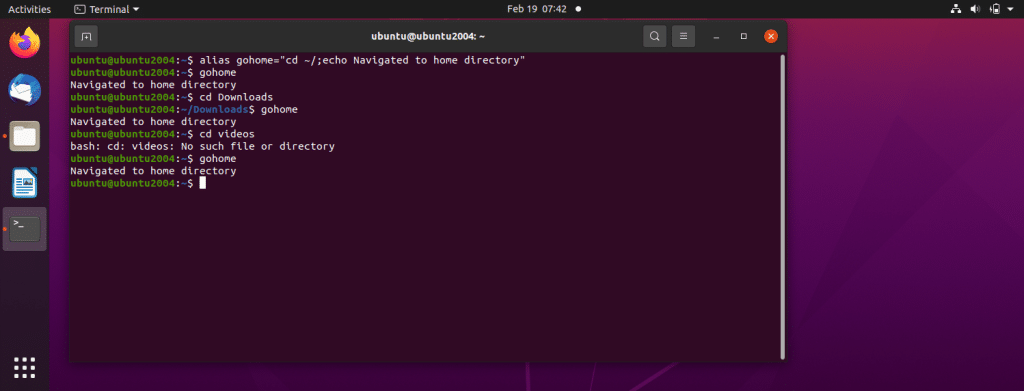
Say you have to create an alias command called gohome. Running this command should take you to the home directory and display the “Navigated to home directory” message.
Method #1:
This way is the usual way of adding an alias command. You have to add the two commands separated by a semicolon (;).
alias gohome="cd ~/;echo Navigated to home directory"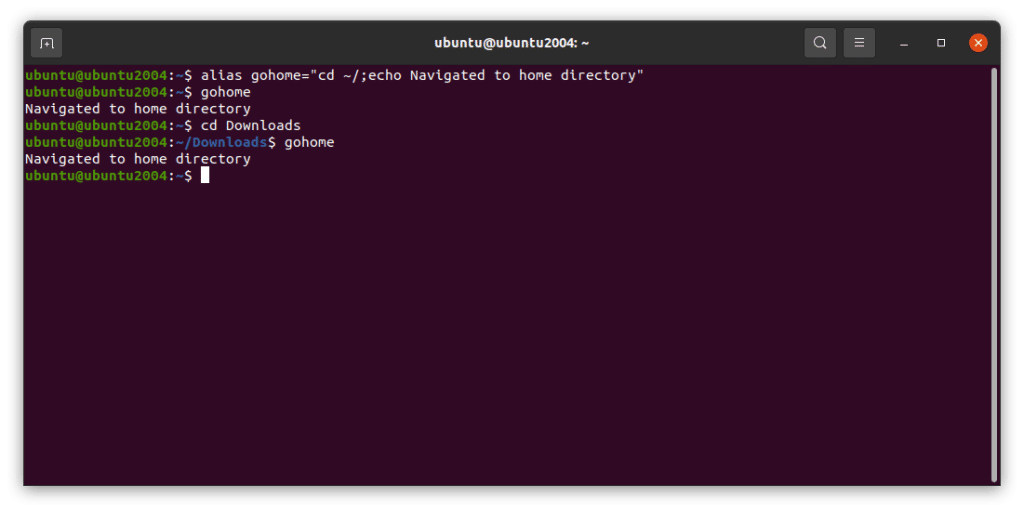
Method #2
This is a bit of a different way. To achieve this you have to make a change in your .bashrc file. You have to define a function in the .bashrc file with all the commands nested within it.
Open the .bashrc file using nano.
sudo nano ~/.bashrcCreate a function named gohome with the above 2 commands.
function gohome() {
        cd ~/
        echo Navigated to home directory
}
Save and exit nano by pressing the Ctrl and x key.
Reload the terminal by running source ~/.bashrc and you’ll be able to verify the gohome command now.
Note: Creating a function will not list it as an alias command on running the alias -p command.
Conclusion
In this article, you learned how to create your own commands in Linux.
Using an alias command will definitely increase your productivity. I’ve witnessed exponential growth in many people after seeing them using alias commands. I would recommend that you all setup your own alias commands.

